Search This Blog

Sunday, December 14, 2014

Subtitles - Converting a DVD MKV to IDX SUB files on a Mac

I've done a few posts about subtitles, and I continue to experiment and learn all the time. If you want to read the other posts, then please have a look at:

Subtitles - Convert SUP to SRT

Ripping your DVDs and Blu Rays pt.2: Extract Subtitles for M4V / MP4 / iTunes

They may help answer your questions. This post is specifically about DVD subtitles in an MKV container. DVD subtitles are not an image, they are a text file (Blu Ray subtitles are images and are stored in SUP files).

I will be using the excellent Swedish drama 'Crimes of Passion' to demonstrate.

When you look in Handbrake you will see they appear as VOBSUB (text files):


What Handbrake does is to then apply the worst font in the world to it to create a horrible looking output:

"Good grief," thought Puck, "I can't be doing with this subtitle font..."

Ahhhh! It's horrible! It looks very jagged even on a small screen, but on a big TV it's awful! Also, if you burn it in, you can't ever turn it off. You never know, you might learn Swedish sometime... Or have Swedish friends over to watch it whilst you are cleaning the car....

Anyway, luckily, the font that Apple devices (iPad, iTunes, Apple TV) use are much nicer and it would be great to have those instead. We just need the subtitles in a file inside the MP4 container

"Well don't burn it in - just rip the subtitles as a file and turn them on in Quicktime or something" I hear you cry! Well, yes, you could try that, but Apple devices don't understand the subtitle output. Don't know why... Subler sees it just fine, but it causes Quicktime to error.

Here's how it's done (as ever, using my Mac - PC/Linux users will have to try and find equivalent software).

For this article, I used:


Handbrake

Rip the MKV to MP4 using Handbrake, but don't include the subtitles! Don't know how? Read this:

Ripping your DVDs and Blu Rays for your Apple Mac / iPod / iPhone / iPad etc

MKVToolNix

You will need a handy little tool called MKVToolNix which can be downloaded for PC, Mac and Linux. Once installed, open the program GUI and find the MKV file you are wanting to rip and "add" it. Now you want to look for the subtitle track you are after and make a note of the ID number - you'll need it in a minute:


Now you need to open Terminal, because you are going to use the non-GUI utility mkvextract, that comes bundled with MKVToolNix, to get the subtitles extracted. You will need to type the following:

/Applications/Mkvtoolnix.app/Contents/MacOS/mkvextract tracks /<MKVpath>/<MKVTitle>.mkv  <TrackNo>:/<OutputPath>/<OutputFile>.sup

<MKVpath> = the directory where your MKV is stored
<MKVTitle> = the name of the MKV
<TrackNo> = The subtitle track number you made a note of earlier
<OutputPath> = the directory where you want the subtitles
<OutputFile> = the output file name

One you hit enter, the subtitles will be extracted:


And once the progress = 100% your subtitle file is ready and waiting!

Now the program is clever - it knows these aren't images so it changes the output file to be IDX and SUB. The IDX file is the index file and the SUB file is where all the subtitle text is held. None of that matters really, it's now a text file, and as such can be understood by a wider variety of programs - including Apple products.

Subler

Good old Subler - where would I be without it - it's a brilliant utility for the Mac.

You just need to add the subtitle track and save it - I've detailed how to do that in this blog post towards the bottom of the article.

You are adding the IDX file this time, rather than the SRT, but it's the same process as before apart from that.

FINISHED!

And so here we are - the finished movie:

"At last", thought Puck, "a subtitle font I can adore..."

These subtitles are now ready to be used on your iDevices and you can set options on devices like Apple TV to make them bigger or smaller or change the font. Huzzah!


iTunes 11 and 12 Not Updating iDevice Apps Automatically

This is a doozy. I've been trying to figure out for a while now why iTunes 11 and 12 no longer updates apps on an iDevice (like an iPod or iPad) automatically. It used to be that when you plugged in an iDevice and synced it, new Apps that had been downloaded to your computer were automatically transferred to the iDevice. This hasn't been the case since iTunes 11. Progress? Not sure about that! Well, I still don't know why but I have found some workarounds. (Screenshots are from iTunes 12.01.26 on a Mac)

Automatically install new apps checkbox

In the "Apps" menu of your iDevice you will see the checkbox shown above at the bottom of the list of apps. Check it and hey presto all apps will sync....along with everything else not on the iDevice. This is fine if you are running one device, but if like me there are family members using the same iTunes account and each have different apps this isn't going to work.

Summary: fine if you want all your apps on all your devices
Command key

If you scroll down the list of apps in the "Apps" menu of you iDevice and find one that needs updating, click on the "Update" button whilst holding down the Command key. Magically, all of the icons will then turn to "Will Update"!


Now, there is a catch. If you have a lot of apps that need updating and not a lot of room on your device, you may well get an error message.


If you do, find the triangle icon with an exclamation mark and click on it:

You will get a message like this:


Panic ye not! It's just there isn't enough free space to get all the apps on in one go. Just find another "Update" button, click on it again (whilst holding the Command key) and repeat the process as before. The more free space you have, the less iterations it will take. So get rid of those old apps crowding your iDevice!

Some really large apps may be left and simply won't update in a batch. You'll have to do those one at a time or free up more space. 

If you can't free any more space, then try updating via the App Store app on the iDevice itself. If that doesn't work, you will have to free up more space or just keep the old version of the app.

It works - it's a bit manual - but it does work...

Conclusions

A bit of 'trial and error' has yielded two ways to get apps from your computer onto your iDevice. of course, I might have just missed a setting somewhere - so if I have - please leave a comment!

Friday, March 14, 2014

Citrix Receiver Mac - How To Change From Fullscreen To Window

Spent a frustrating few minutes trying to figure out how to exit Full Screen mode on Citrix Receiver with no menu and no idea what the shortcut key on the Mac was to get to the menu. Then hit my friend Google for advice. Came across a post which helped my out on the Citrix Discussion board

"ctrl + alt on the Mac keyboard was what I am looking for. It brings up the menu bar and the dock and lets you get out of the fullscreen mode."

Thanks to Matthias Hofmann for that answer!

You have chosen not to trust... - Citrix Receiver certificates for Mac

My work has a Citrix desktop meaning I can log in remotely to it using Citrix Receiver for Mac and a web browser. I recently tried to do this from my Mac (having used a Windows laptop previously with no issues) but came up against a curious error message:

"You not chosen to trust Thwaite Authority, the issuer of this servers certificate"

Really? Have I? Didn't remember not trusting anything... So off to Google I went. I found out the answer in a post on the Apple Communities from MacManiac_ which I thought I would outline here for reference.

The basic issue seems to be that Windows can navigate into the Citrix farm and get it's own certificate. The Mac cannot, without being given it explicitly. But the good news is you can copy the certificate from a Windows machine to a Mac and it will work. So you will need a Windows PC and this is how it goes:

Windows Machine Instructions:

1) From a Windows computer, log in to the Citrix Gateway once and launch any application.     This will ensure that the certificate gets installed in Windows, if it’s not already present.
2) In Windows, log out of the Citrix gateway.
3) launch Internet Explorer if not already running.
4) in IE, go to the Tools menu –> Internet Options –> Content tab
5) click the Certificates button
6) click the Intermediate Certification Authorities tab
7) find the “xxx Authority” certificate in the list (where "xxx" is the name in the certificate error from Citrix Receiver on your Mac - in my case - Thwaite Authority)
8) click the certificate once to highlight, then click Export
9) click Next
10) choose DER Encoded Binary X.509 (.CER)
11) click Next
12) click Browse, and change to the Desktop if not there already
13) in the file name field, type or paste: Network Solutions Certificate Authority
14) click Save, click Next, click Finish.
15) there should now be a file on the Windows desktop with the name
       Network Solutions Certificate Authority.cer
16) copy this file to the Mac in whatever way you normally move files.

Mac Machine Instructions:

17) on the Mac, copy the file to your desktop.
18) in Finder, go to Applications –> Utilities
19) launch Keychain Access
20) open the System keychain and import the certificate
21) restart your Macintosh and then try to access your Citrix Gateway again

This is reproduced from that post from MacManiac_ so a big shout out to him/her. This works like a charm and I was logged in and working in no time!

NOTE - I am using Windows 7 and Mac OSX 10.8.5 but I suspect it's broadly similar across operating system versions


Sunday, March 2, 2014

Subtitles - Convert SUP to SRT

Ah subtitles... When ripping Blu Rays from an MKV to M4V (MP4) they used to be quite a pain in the backside (see this previous post for details!). But if you are happy with 'burning in' subtitles (i.e. having them form part of the picture) then Handbrake v 0.9.9 will happily provide this service for you out of the box.


As you can seem you just simply go to the 'Subtitles' tab and choose the subs you want and lo and behold the Bitmap image of the subtitles will adorn your movie:


It even retains the font and colouring because these are images - not text.

Now this is fine for 'Forced Subtitles' (where the characters speak gibberish - in the case above taken from "Thor - The Dark World" - 'Dark Elven') but when you want to have the ability to turn the subtitles on and off, this won't work. These subs are burnt onto the picture. If you want to have the ability to switch languages, or something like that, the subtitles need to be stored in a file - usually a text file.

A media player like VLC does understand the subtitle files that are images natively and will happily let you turn them on and off through a menu option. iTunes or QuickTime does not support image subtitle files - only text. So how to convert the bitmap image to a text file? Well, as ever, it's a bit complex....

Fear not - I shall attempt to steer you through the pitfalls. You will need the following software:


You will need a nice MKV version of your movie with the subtitle track that you want included (no idea what I mean by that, then please refer to a previous blog post of mine on how to do this).

This walkthrough is for a Mac, with a bit of Windows PC software thrown in. I'm sure equivalent software are available for both platforms. The reason I use Subtitle Edit is a friend recommended it and I haven't found a Mac equivalent.

Let's begin...

MKVTools

(1) Open MKVTools and open your MKV file.

(2) Navigate to the "Edit" Tab and choose the subtitle track you want to export (If you aren't sure, open the MKV is something like VLC Player and fiddle with turning on the different subtitle tracks until you find the one you want, then go back into MKVTools).

(3) Check the "Extract Selected Tracks" box on the right and click "OK". Another window will open and you will see the progress of the file extraction. It will store the subsequent SUP file in the same folder as your MKV file.

UPDATE - 14th December 2014 - An alternative to MKVTools

I haven't been using MKVTools recently. I've found a better way using MKVToolNix. I've detailed how to use this in a seperate blog post (which deals with subtitles from DVDs, but can also be used to get the SUP file from Blu Rays using exactly the same method):

Subtitles - Converting a DVD MKV to IDX SUB files on a Mac

Subtitle Edit

Switching to my Windows PC now, I take my extracted file and load up Subtitle Edit

(1) Open the software and select the "Open" menu option then choose your SUP file. It will open into the "Import/OCR" screen like the image below:


(2) The software will now attempt to OCR the subtitle images. In plain english, it will scan the subtitle images and translate what it reads into plain text. No OCR is perfect, it will make mistakes (especially in a fantasy tale like Thor! - "Send in the Kursed" sugggested as being changed to "Send in the Nursed"!) but we can correct those as we go along, ignore them or sort them out later...


(3) And so you end up with an editable list where you can go and make corrections where necessary. Click into the Text box and correct away. If you want to compare it to the source images, then open up the SUP file in a tool like BDSup2Sub and browse through the file.


Now I've only scratched the surface with this program. You can look at the Subs over the video, correct timings and do all sorts of funky things. But if you've ripped the subtitles from the same MKV as you ripped the movie, then there's no need. You simple need to focus on getting the spellings and words correct.

Obviously, in my example, there aren't many lines of text. I appreciate in a fully subtitled movie there is a lot of work potentially - but that's just the way it is!

One you have finished your corrections, save your file as a SubRip (.srt) format and back to the Mac you go...

Subler

If you have read some of my other blog posts, you will know I like Subler and it makes this last step super easy. 

(1) Open up the movie (the MP4 or M4V you ripped from the MKV) and click on the + button in the top left-hand corner:


(2) Locate the SRT file you saved earlier and click "Open". You will see the screen below which you just click "Add" on:


(3) Save your work. This also assigns the subtitle a Track ID, which you will need

(4) Now click on the Subtitle track and set the following options:

Language: English (or whatever language you are using)
Alternate Group: None
Forced: All Samples Are Forced
Forced Track: Choose your subtitle track


(5) Now Save again - and you are done!

THE FINISHED MOVIE

Here's a screen shot using QuickTime player:


The text subtitles are at the bottom. QuickTime doesn't support the forcing of the subtitles. iTunes does, and so your subs should display automatically - but if they don't just choose them in the menu option manually.

SUMMARY

If it's alien speak you're after, or you will always want the subtitles on (such as in a foreign language film) then just burn them straight onto the image using Handbrake. Easy peasy and it retains the nice fonts and colours.

If you use Quick Time or iTunes, and want to turn the Subs on and off, then it's a bit of a painful process, but it works just fine.

As ever - any feedback - please leave me a comment below...

Thursday, January 3, 2013

Restore iPad Mini from iPad but no apps, movies, music appearing

My wife got a new iPad Mini for Christmas to replace her old iPad 1. I thought the easiest thing to do would be to take a backup of the old iPad and move it to the new iPad Mini.

When doing this, iTunes asked if I wanted to update to iOS 6.02. I said I did. And I think that's where the problem started, because afterwards none of her apps or media appeared on the new iPad.

So I tried the Restore From Backup again. Still no apps.

What was appearing was her wallpaper and her shortcuts, but not the apps themselves.

I reconnected the old iPad and took another backup, then tried to do another Restore. Same result.

Time to hit Google. I found a post which seemed to talk through the issue. Again the user asking the question had also updated their iOS during the install. The guy answering talked though a solution, but as I read the subsequent posts the apps still hadn't restored. Post can be found here:

https://discussions.apple.com/thread/4484316?start=0&tstart=0

I tried it anyway, and guess what, no apps. Not surprised, but I thought it was worth a go.

I remembered experimenting before with a corrupted backup that refused to back up properly and found that encrypting the backup forced it to do a full backup that made it work again. So I re-backed up the iPad 1 with encryption. This has the added benefit of backing up the passwords for the WiFi and email and so on.

I restored that to the iPad Mini. No apps.

I threw in the towel, and said to my wife that we had lost all her apps and their saved state. Perhaps it was an iPad 1 to iPad Mini thing...

Anyway, things weren't as bad as they seemed. When we started to manually load the apps on to the iPad, via iTunes, some of the saved state data came back. Kindle remembered her account details, her travel app remembered her packing lists. Some apps didn't, like the Olympics app didn't know about all the events she had saved, but they were definitely in the minority. Most of her apps remembered her settings and saved data.

So, to conclude, it might be an iPad 1 to iPad Mini issue. It might be that I updated the iOS. I don't know. However, the majority of apps, once restored manually, worked fine.

If you are attempting this migration, I would recommend not updating iOS until after everything has finished syncing. It's worth a try. Let me know if it works for you by posting a comment below, or if you have solved the issue - again - let me know.

Tuesday, November 27, 2012

Clean Install of Mountain Lion The Hard Way

It was supposed to be so easy. That's what the guide I used said. I've been having a few problems on my Mac with applications crashing and taking down OS X with it, so I decided to take the opportunity to download Mountain Lion and rebuild my iMac from scratch.

A quick surf around the web at lunchtime produced a great tutorial called How To Create A Bootable OS X Mountain Lion USB The Easy Way. Having read this it seemed pretty straight forward, so after getting home from work I set about following the instructions.

All went well until I had wiped my Mac internal hard drive and was beginning the install of Mountain Lion. It estimates 6 minutes until is needs a reboot, counts down to 0 minutes then sits there for about 5 further minutes. Then I hit an error message:

"Can't download additional components needed to install OS X"

Oh dear. Never mind, looks like my wireless network wasn't connected. Should fix it. So I re-run the "Reinstall OS X" menu option.

Same message.

I try this several times with the same, frustrating result. At this point I can hear my mates with PCs laughing at me, because Macs are meant to be easy. Right?

So I hit Google again and come across a forum post on MacRumours. Basically, this guy is having the same problem as me and there are a few answers but nothing really helpful to me.

There is a link to a guide on creating a bootable USB that doesn't need the download elements, but I have no OS X in which to do this. Those of you with a 2nd Mac should try this.

A bit more searching reveals a helpful MacWorld article on "Recovery Mode". If you have Lion, or Mountain Lion, installed before attempting a clean build a partition will be created to allow you to access components to rebuild the machine.

Using the cmd+R keys on startup I manage to enter this mode. I am authenticated using my Apple ID and I can begin recovery of Lion. But I want Mountain Lion. So I decide to try the USB one last time.

Still that same message.

So I reboot and hold down cmd+R. This time, I am taken to the Internet Recovery Mode. This I am supposed to get to using alt+cmd+R. Maybe I hit this by accident, but I decide I am taking no more chances. I am offered the chance to recover Lion and I take it. By the way, Internet Recovery Mode takes ages to enter - about 7 minutes on my Mac. So make a nice cup of tea. You will probably need it!


So I have gone with "Reinstall OS X" and I am now downloading Lion. This takes approximately 45 minutes on my Internet connection, but may be faster or slower on yours if you are at this point too...

The screen says "About 0 seconds remaining" for about 10 seconds then reboots. I am now greeted with a nice "Install Mac OS X" screen and an estimation of 23 minute until completion.


I am then greeted with a cheery reboot button. This doesn't reboot, however, but throws me back to the Mac OS X Utilities screen. So I reboot from there. Macs are intuitive, apparently :-).

Hurrah! A clean install of Lion!


So what now... Well, I still want Mountain Lion, so I go to the App Store and start the 4.37GB download AGAIN!!!

Meanwhile, I run Software Update to make sure I'm on the latest version of Lion. I read somewhere you need to be on a pretty high version to run the Mountain Lion upgrade, so best to check I am on the latest build. It turns out that the recovered Lion is the latest version, so I decide to download a few bits and pieces like a new Safari update and a malware removal tool.


Luckily I have a fast Internet connection, and also need another cup to tea....

40 minutes later and I have it downloaded. Not quite. 30 minutes in I have had the "restart computer" death message which I have been hoping to avoid that totally crashes my machine... I suspect my memory is bust, but that's another story...

Then I remember the Mountain Lion install program in on my memory stick. The one I tried to boot from. Doh! I can use that...

I decide to just upgrade Mountain Lion over Lion (after I have rebooted) and call it quits... I could try and do a really clean install of Mountain Lion by recovering it after I have upgraded the Lion, or creating another bootable USB, but I can't be bothered. Especially as my "restart computer of death" message seems to have nothing to do with the OS.

So off we go with the upgrade. I'm nervous as the screen looks the same as it did before. The preparing to install and 6 minutes remaining message appears, as before. This time, I am hoping it actually works... It still decides that there are random minutes remaining, flicking between 6 and 3 erratically, whilst the blue bar inches across the screen.


After 15 minutes of this - the old classic message appears about not being able to download components. Right - re-download from App Store then...

Another 40 minutes, and another cup of tea, move on by. I hope my Internet broadband provider aren't monitoring my connection too much tonight as I am getting through a lot of downloaded data!

I decide to copy the file over to a USB stick. That way, if it goes pear-shaped, I don't have to download it again. It's more delay, but I'm getting used to waiting...

That done I start the installer. I am met with the screen above. Uh-oh. But the good news is it only lasts for a few seconds before we are restarting the Mac and off to the Mountain Lion installer. Hurrah! Getting somewhere! It guesstimates 34 minutes to install....

After watching some tele, I'm back in front of the screen and we are done. It has taken about 30 minutes.

I don't know if this rant is helpful to anyone, but it felt good to document my trials anyway :-)

If I did this again, I would go into the Recovery partition and install Mountain Lion from there. If I were to give you advice on upgrading from Lion, I would probably install Mountain Lion through OS X, then head to the Recovery partition and clean install it from there. After you install Mountain Lion, the Recovery partition will allow a clean install of it, overwriting the previous Lion Recovery.


Sunday, July 15, 2012

Record iPad / iPhone Screen Without Jailbreak using Reflection

There is no native way of recording your iPad or iPhone screen. I can understand why Apple haven't put this feature onto their devices, as it opens up all sorts of opportunities for copyright abuse, but nevertheless, it can be useful to do.

I've been looking around for a while trying to figure out how I might do this and I came across an OSX application called Reflection.

Go to the Reflection website (http://reflectionapp.com) and download the DMG file to your Mac.

Once installed, you can then use the Airplay function on your iPad or iPod and you can now view your screen and the audio on your Mac.

Pretty cool.

You can try it for free for 10 minutes of Airplay time, and once you are happy it does what it says on the tin, you can pay a very reasonable $14.99 for a single license or $49.99 for 5 licenses.

A word of warning is that you will need a fast internal network. My 2.4GHz wireless produced less than impressive results. Once I switched to my 5GHz network, everything was fine.

I've made a video tutorial which you can get to via my YouTube channel or by clicking below:


Any questions, please fee free to leave a comment and I'll try and come back to you.

Tuesday, July 3, 2012

How to Download iTunes Movie and TV Show Artwork Free

Want an easy way to get those high quality iTunes art for Movies and TV Shows? Its free, easy, and doesn't require downloading software or going to any websites except iTunes itself.

And the artwork will be displayed on your iPhone, iPad, iPod etc just like any other.

I blogged before on how to rip your DVD and Blu Rays to iTunes in previous posts:

Ripping your DVDs and Blu Rays for your Apple Mac / iPod / iPhone / iPad etc

Ripping your DVDs and Blu Rays pt.2: Extract Subtitles for M4V / MP4 / iTunes

HD-SD Tag: Having HD and SD movies in iTunes

But say you've got that far, and now want the iTunes artwork. Follow this simple guide:

(1) Find the movie in iTunes

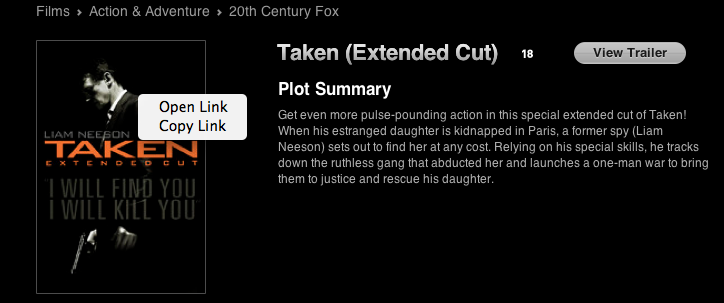
I've used the marvellous Liam Neeson movie "Taken" as my example here:


(2) Right click on the artwork and click "Copy Link"

(3) Open up your browser of choice and paste the link and go to the web address

(4) Now find the link to the picture and navigate to it

In Google Chrome: Right click the picture and select "Open Image in New Tab"


In Safari: Right click the picture and select "Open Image in New Tab


In Firefox: Right click the picture and select "View Image"


(5) Edit the hyperlink address

In the address box of your web browser, you will see the image URL - looking something like this:

Now select everything in the address that is numeric before the .jpg extension:

Delete it, and delete any superfluous dots left behind - so in my example above I would have ended up with two dots because I didn't get my selection and delete quite right. I just want "dj.tciejzpb.jpg" as the filename.

Go to the URL (usually this can be done by hitting <Enter> on your keyboard)

(6) Copy and paste the picture into iTunes

You will now see the large iTunes artwork displayed on the web page. Simply copy and paste it into the iTunes entry for your movie:


You can do this by saving the image somewhere, then going into iTunes, right clicking the movie and selecting "Get Info" then the menu item "Artwork" and clicking on "Add..." and selecting the image you just saved.

That's it! Really simple.

I have on the odd occasion had some movies that don't work. It is usually during the Step 5, where I have the correct URL for the large picture but it just doesn't display anything or gives an error. It's happened once or twice. I usually go away for a bit and try again, and it works. It could be my browser, or some other reason, but it does work eventually...

So no need for extra software, or going to a database website - just go straight to the source!

Music - a word of caution

For some strange reason, this method doesn't work for Music. It does work for Movies and TV Shows. It's odd why it doesn't work, it just gives an error. It must be iTunes codes that artwork in some different way.

And finally...

It won't work if the movie isn't in iTunes (obviously). If that is the case, then Google images are your friend, or if you use Subler, that has a good array of artwork (Go to File / Import... / Search metadata online... then sort out the meta data and the next screen gives you a choice of artwork).

Please let me know if this is helpful by leaving a comment, or post a question and I'll try and answer it.

Sunday, July 1, 2012

Google Chrome on iOS

What a great day today is. A momentous day. One I shall long remember... OK, perhaps that is a bit over the top, but I am very excited that whilst surfing the iTunes Store for the Blogger app (being used right now to type this on!) I came across Chrome that became available a few days ago.

So what's it like? Magic.

If you like Chrome on your desktop you will never go back to rotten old Safari again.

You get a similar look and feel to the desktop version. There's the tabs, the type in address box to search and the ability to sync your bookmarks and open tabs between your different Chrome sessions on different devices.

In addition there are some cool bits. First is the ability to swipe between tabs. When you do it, you wonder why nobody has thought of this before in the Safari team. Then there is the speak to search. Siri eat your heart put, understood me every time so far. Then there is the menu on the side that gives you the option to go Incognito ( like on the desktop where cookies aren't tracked) and the option to force the site to load the desktop version if the mobile one is too restrictive.

Both iPad and iPhone versions work well.

Sure, it's just a web browser. But for me it is the benchmark browser and thankfully it is now on iOS

Friday, June 29, 2012

Yamaha Synth Arp & Drum Pad Review

I'm a pretty big fan of Propellerheads' Figure for making quick and simple tunes on my iPhone or iPad (it has an Android release too). I will get round to writing a review at some point for it, but meanwhile, I had high hopes when I saw a Twitter post from the lovely people at Computer Music mag announcing Yamaha's new iPad app: Synth Arp & Drum Pad.

I was hoping that it would be simple enough to get pretty quickly, but have a few more options than Figure does - particularly when it came to creating and saving songs.

At this point, I should say that I've been sucked into music applications and apps since 1997 when I got my hands on a beta tool that would turn into Propellerheads' ReBirth. I've enjoyed using a few, but too many times been frustrated at how complex some of these applications could be. The birth of the tablet offered hope of a quick and easy music creation experience with touch.

The blurb on iTunes sounded good:

Synth Arp & Drum Pad is an iPad app with arpeggiator and drum pad that allows you to easily play the internal synthesizer or any connected MIDI device and produce music with phrases having an abundant variety of musical styles.
(The arpeggiator automatically plays the individual notes of a chord in a selected pattern.)

There are 342 arppegiator patterns that can play phrases from all kinds of music genres like dance music, hip-hop, rock, pops, with one finger.

I love arppegiators. Don't know how much of my life has gone in fiddling with them, but to have 342! Awesome!

The screen shots looked good too:


It looked like a good balance of synth parts and a programmable drum machine

Would Synth Arp & Drum Pad be that killer combination of easiness combined with power?

It started well. The arppegiator is great. You can lock the link between the voice and the arp sequences, or you can break the link and get some pretty wacky effects with the many voices included with the tool. I have to say, I spent a good hour just playing with all that and had a whale of a time!

The tricky bit came to the adjustments. For a start the touch sensitivity is woeful. When you turn the effect pots there is a noticeable lag, making real time or sensitive adjustments pretty much impossible. Transitioning notes during the arp sequences to create chord variations is hit and miss too. I found horrible missed cuts, even with quantization on, as the touch sensitivity just lagged behind.


Once you do get an adjustment going and hit the right notes at the right time you can make some killer leads and bases. Yamaha have put at lot of thought into the arp sequences, and as I said before, the voices are all pretty good.


On to the drum machine screen.


Again, started well. Nice array of sixteen pads. Bashing some of the demo notes revealed some good sounds. On with the programming. And here another hour was lost. But instead of a joyful hour, it was an hour of frustration trying to make the damn thing do what I wanted it to do.

OK - at this point I must point out my drum machine history. Roland. Sorry, it just doesn't get any better and I've never seen a reason to change my view on that. The TB sequencing and step sequencing come natural to me. Yamaha's interface didn't.

Now it might be me. it might be the Korg guys and the Yamaha guys, and even you Roland people out there, just get this interface and make beautiful patterns. I just didn't get it. The manual is rubbish, and was no real help.

You can assign a pad to be a sequence or a hit. The yellow ones in the picture above are sequences. Take a lot at the screenshot below:


When you edit a pad with a Seq that is what you see. The notation is flamming MIDI. I'm sorry, I'm sure lots of people like that, but as a Roland guy I like "House Bass" or "Techno Kick" and I like to rename them if I want to. And I know I can rename them in the Pad Edit bit. But seeing "C1" just means I have to muck about figuring what type of sound "C1" actually is. Life's too short...


The bars below are where the hit occurs in the 16 step sequencer. Just try getting that to work easily. You can see my pathetic attempt on the end of the bar to do a rolling kick. I just couldn't get the levels right and got fed up.


The final kick in the teeth was the measure panel. I thought I could edit each measure so that in four bars I could add variation. Nope. It is an indication of when the sounds are triggering. if you deselect 1,2,3 then the sounds only fire in bar 4. So if you want so variation between bars that has to be done on another pad. Grrr....


So would Synth Arp & Drum Pad be that killer combination of easiness combined with power?


Frankly - no

Sorry Yamaha. I'm sure this may turn out to be a great app, and probably is for some people, but just not for me.

I realise I haven't touched on other aspects of this app, but I got fed up with it. I love the arps, and will probably sample them or use them with another app in some way. The interface is not for me, and the drum machine is - well - pants.

Of course, this is my opinion. What do you think? Is it right up your street? Or do you agree with me?

Tuesday, June 26, 2012

Alternatives to Thinkfuse.com

Our organisation uses Thinkfuse.com, or rather, it did until the founders sold the company to SalesForce. Whilst they are "excited" about this news (whilst pocketing a few quid no doubt), it does leave those of us using their technology - well - a bit buggered.

You see, they are discontinuing the service. As soon as the calendar hits 25th July, 2012, they will wipe out the data. Lord knows why SalesForce doesn't want to keep the data, and just keep the service going, but it doesn't. So we are in a bit of a pickle.

Having looked for alternatives, I was quite shocked at how few there are on the market. Thinkfuse is so simple, so laughably simple, that I would have thought there would be loads of alternatives. It is basically a fairly poor web editor where you write up a report every week for your manager. You get some reminder emails, and the manager gets a nice dashboard to view your reports. Well, a simple dashboard at any rate.

If I were Theo on Dragon's Den, I'd be thinking "barrier to entry - zero - I'm out...". But it seems this market has passed by many web types. There are lots of heavy weight online tools out there, which have status reporting as part of projects, but not many that have team status updates.

Here's some I have found:

http://www.weeklydebrief.com/


This seems to be a recent tool, and is currently running in beta. This means it's free to sign up, although once it exits beta it will be a paid for service.

There is a short video tour that shows you around the product.

It is different to Thinkfuse in that team members submit their reports via email (in Thinkfuse there is a web-based interface to do this). Two emails are sent; one for "Things achieved" and a second for "Things planned". This many be a good way for your team to do this, if they are wedded to email, but if you are trying to encourage more collaborative tools, perhaps it's not for you.

The manager can then view a rather nice PDF report, that really looks quite flashy. It would certainly be very good to forward on to senior management "as is".
Of course, getting it to look that good for you will need nice photos of your team (tough if you run a development team) and a bit of design flair. Still, it's a good thing to have.

There are also iPhone and iPad interfaces if that floats your boat, as well as standard web interfaces.

http://www.simple-status.com/

This site is a bit more organised than Thinkfuse and Weeklydebrief. Employees are encouraged to organise their activities into categories, shown in the screen shot below:
As you can see, there are Goals, Tasks and Accomplishments. You can add your company's logo to the dashboard, as set preferences to see the information how it best suits you.

It's not too clear on the website how it works, but it appears that status reports are centred around the information in these three categories.

Again, different from the more freestyle entry in Thinkfuse, but may suit some better.

There is a short video to watch, to try and glean more information.

This is also in beta, which means it's free but is limited to 10 users in a team. It will convert to a paid for service at some point.

http://www.15five.com

If you scan to the comments below, you can see Shane  @ 15five got in touch suggesting his company's product. I checked out their website, and it didn't help me much, but have found some good reviews on the web which helped figure the product out.

15five is based on a simple concept; it should take team members up to 15 minutes to write their report and a manager 5 minutes to read it. The manager assigns questions which can be one line answer, multi line answers and so on. The employee gets an email notification and fills in the report on the web. The manager has a dashboard and can then review them.


There is an emphasis in hierarchies too. So in our example, once the manager gets his reports, he can submit a report to his director, who then submits his report to the CEO. That's quite a neat idea.

There is a 4 week trial period and the price is $99 a month for up to 20 employees.


For more information check out an thorough report over at appstorm and also an article from a real-life user over on the Inc. website. Also, email Shane who I'm sure would be happy to help out.

http://www.teamly.com

Many thanks to Scott who posted a comment telling me about his solution over at teamly.com.

Teamly gets you to enter your top 5 daily, weekly and monthly priorities (great for fans of the Nick Hornby novel High Fidelity!). Managers can see all the priorities set. Comments can be recorded by both managers and their reports. Priorities can be made private.


There is an ability to mark priorities according to their status, so the manager can see what everyone is doing. There is some basic reporting packaged too. For a user workflow, check out http://teamly.com/tour. A video tour is available from the home page.

There is a free to use, ad supported option or to remove the ads and access some more features for $8/mth per user.

I can see this being a good solution for some, but for others, it could feel like micro-managing if a boss insists on daily goal setting. The red / amber / green colour coding might induce panic in some employees, which might be a good or a bad thing!!

A word on the website - it's good and the information is well laid out - but strangely no menu options are available from the home page. Click through into the tour, and you get menu options for the pricing, testimonials, etc.


Others

I was also asked to check out siasto. It doesn't have the greatest website in the world, and what was quite odd was that in one screenshot someone seemed to be sharing with their team that they were going to fire someone. I suspect this breaks several EU working laws!


Anyhow, the tool does appear to be very project-oriented, so probably not for us.

Someone also recommended workflowy. This is a real "marmite" tool - people either love it or hate it. It seems most suited to keeping personal lists and sharing with friends/colleagues, rather than sharing them within a team hierachy. If you like lists, take a look. If you like mindmaps - avoid. It's not suited to replacing Thinkfuse, in my view, but you may think different.

I did look at binfire, but it is far too project-oriented and I also took a brief look at estatusreports, but it is software and quite complex, so not a simple, online tool.


Conclusions

Initially I found two comparable services, but as this blog has been read other services have been suggested. There still isn't a like-for-like competitor. which still amazes me, considering how successful Thinkfuse was. Whilst Thinkfuse was great, it was pretty simple and very easy to replicate better than they did it. Now it has gone the way of the Dodo, there is room for a simple tool to replace it.

The market seems to want to focus on helping people organise their worklists, rather than allow a sort-of brain dump. As such, there aren't any like-for-like replacements I can recommend. You are best checking out the ones above you think might be interesting and exploring from there, recognising they all force some kind of structured thinking.

Please let me know if you have any further alternatives. I'd love to hear about them!

N.B Company Websites

Small rant. Throughout this investigation, I have been amazed at how poor some of these websites were. All I wanted was some screenshots, some words on the features, maybe a short video, a pricing plan and a link to some reviews or testimonials. Only weeklydebrief and teamly actually had this (and teamly's is hidden!). The rest required looking for reviews on Google, or trying to work out from other articles how the thing worked. The websites were mainly moody photos and little content, insisting your signed up to see more.

Not everyone wants to sign up for a free trial just to see how a solution works!

Rant over...

Friday, August 26, 2011

Ripping your DVDs and Blu Rays pt.2: Extract Subtitles for M4V / MP4 / iTunes

UPDATE March 2014

Handbrake (from version 0.9.9) will now burn subtitles direct from MKV containers ripped from Blu-Rays as the screen shot below shows:


But I've kept this post on, in case you are using an older version of Handbrake.

Also, for the record, BDSuptoSub can be run on OSX - but you need to install the OSX Java engine
------------------------------------------

In a previous post, I covered the method I use to rip DVDs and Blu Rays for use in iTunes and iOS products (check out the article here if you missed it).

To recap the tools I have:

I have been trying for sometime to find a way, using my Mac, of carrying subtitles over from Blu Ray discs onto these ripped M4V files.

(BTW, Windows users, the following software all comes with Windows versions - so you should be fine to follow this summary described below.)

Often films contain "forced subtitles". These are for when a film in English language has dialogue spoken in a another language, and forced subtitles translate just these small sections rather than the whole film.

They are called "forced" because they play back as default on DVD and Blu Ray players. Trouble is getting them to do the same on your ripped copies.

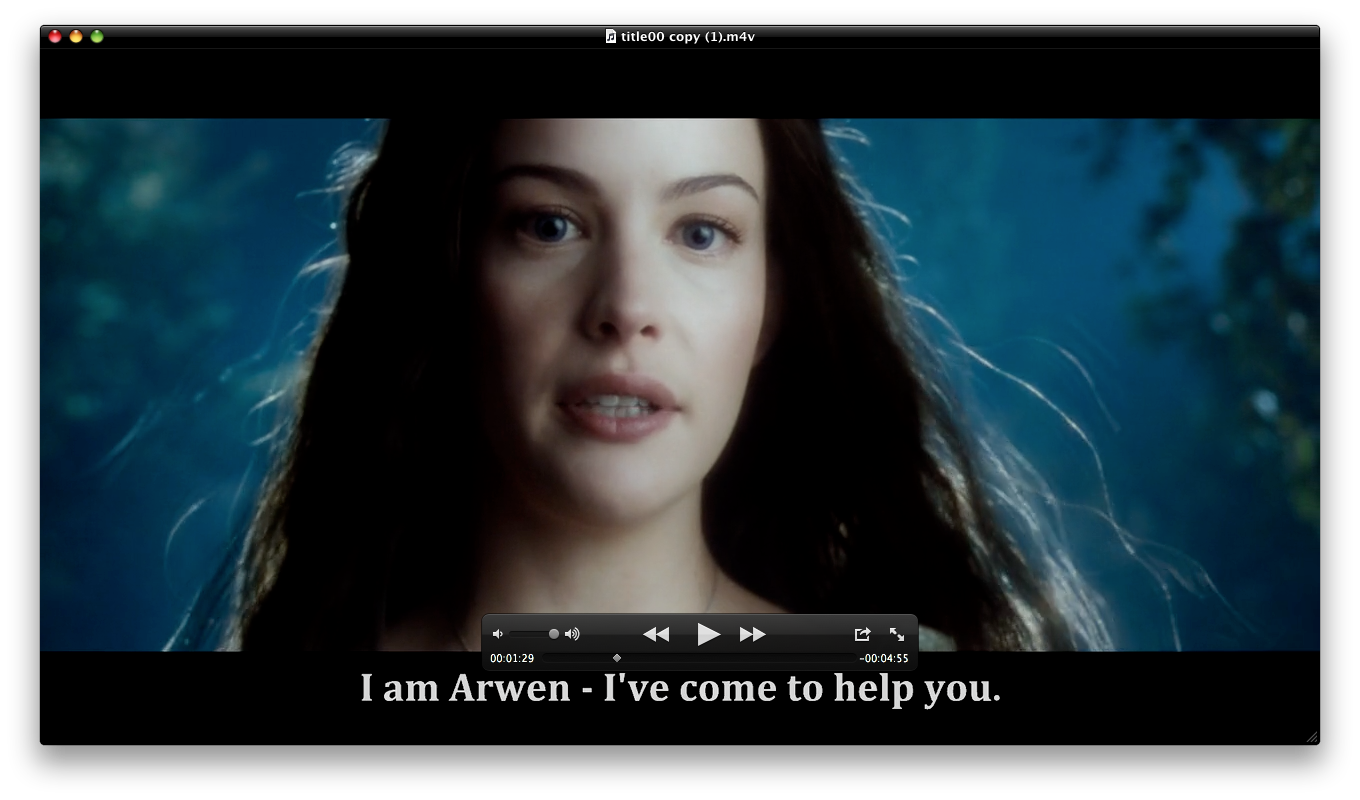
As an example, the Lord Of The Rings trilogy of films have sections spoken  in Elvish for which there are subtitles provided. This has been the catalyst for this investigation, as I really wanted those movies for my iPad.

The method described below also works for full subtitle tracks  - especially useful for me for the Millenium trilogy of films where I like to have the original Swedish soundtrack, and have English subtitles.

Obviously, if you are hard of hearing, this is going to be of great interest too for all your Blu Ray ripping.

DVD

DVD is simple, and can easily be done in Handbrake. As you can see in the example below, this DVD of 101 Dalmatians has subtitle tracks recognised by Handbrake.


All you do is

  • Select the right language
  • Check the "Burned In" box
  • Check the "Forced Only" if you want just forced subtitles, or leave it blank if you want all the dialogue subtitled.
That's it.

Blu Ray

Blu Ray is MUCH harder. This is because the Blu Ray format of subtitles are bitmaps, and as such, as not supported by many editing tools - Handbrake included. To witness The Lord Of The Rings in true HD glory and understand that Elvish dialogue, we are going to need to get some more software:
As an aside, this method may be long-winded, and there could be a simpler way to do it - I'm not perfect! So if there is, let me know! It took a lot of research through various forums....

OK, so we will assume you have a nice MKV file of your Blu Ray with all the audio and subtitle options on it that you need.

MKVTools

(1) Open MKVTools and open your MKV file.

(2) Navigate to the "Edit" Tab and choose the subtitle track you want to export (I know the Elvish to English translation for this Lord Of The Rings rip is Track 2). If you aren't sure, open the MKV is something like VLC Player and fiddle with turning on the different subtitle tracks until you find the one you want, then go back into MKVTools.

(3) Check the "Extract Selected Tracks" box on the right and click "OK". Another window will open and you will see the progress of the file extraction. It will store the subsequent SUP file in the same folder as you MKV file.

BDSupToSub

You will now need a Windows machine, or an emulator on your Mac running the BDSupToSub software.

I have searched high and low for a Mac native equivalent and draw a blank. Again, if you find one, let me know.

(1) Open BDSupToSub and load in your SUP file.

(2) Just leave the Conversion options as they are (the resolution should be 1920x1280 as this is the Blu Ray default).

(3) You will get a nice screen showing you the first subtitle line found. You don't need to do anything with this, just go into File / Save/Export and click OK (changing the language marker if needed).

You will have two files; a SUB file and a IDX file.

MKVToolNix

Back to the Mac environment now, and you need to open up the MKVToolNix tool.

(1) Click the "add" button to add your original MKV file and your new IDX file (make sure the SUB file is in the same folder or it will throw an error).

(2) Scroll down the "Tracks, chapters and tags" box until you see the VobSub entry at the bottom. This is your subtitle track. Check that box and uncheck all the other subtitles.

(3) Name the new MKV "Output filename" and hit the "Start muxing" button and wait patiently....

Handbrake

Now you have your new MKV, open it in Handbrake and check the subtitles tab - you should now see a VOBSUB file that Handbrake understands. 


Set your options and off you go! Your output should look like this:

And there you have it.

Not too complex, just a lot of faffing about with different bits of software.

I'm sure paid for software does this out of the box. Actually, I'm not sure! It might not!